Preparing the screen
After the artwork creation and colour separation process, the next step would be to prepare the screen. The screen is made of a frame, with a mesh mounted on it. The mesh must be pulled tight and taut, making it completely straight to ensure a good quality print effect.
After the screen is ready, a stencil must be made on the mesh. An emulsion is spread evenly across the 2 sides of the mesh and dried in a dark room (away from direct sunlight) before exposing the screen. The stencil is made on the screen via a photochemical process. The positive of the artwork (printed on transparent clear film and well taped down to one side of the mesh) is exposed unto the mesh, this process is known as “burning the screen”. The exposure is usually done on a LED light unit or a direct exposure lamp.
When the light reaches the screen, the positive areas are “burned” unto the screen. Once the exposure is done, it is time to wash out the emulsion which was applied on the mesh earlier. The “burned” areas are washed out with a high-pressure water spray. Dry the screen and it is ready for the next step of the silkscreen printing process.
Note: When working with photo emulsion, be sure to wear gloves as they could harm skin
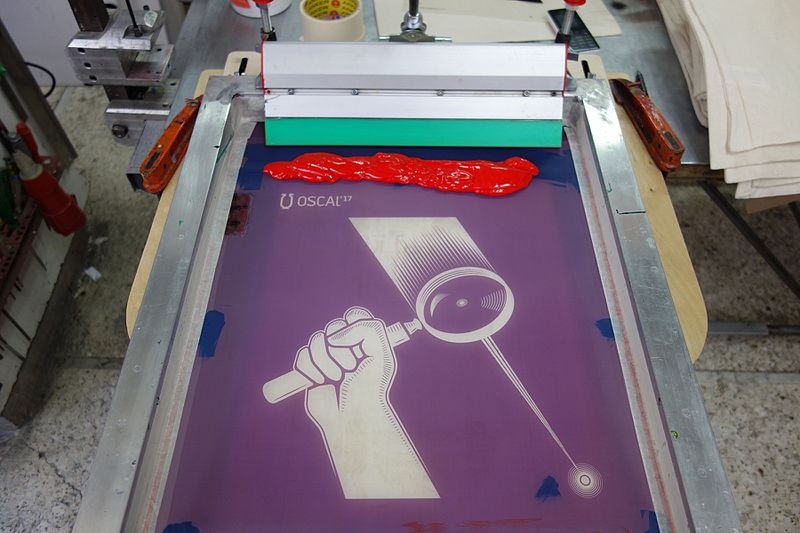
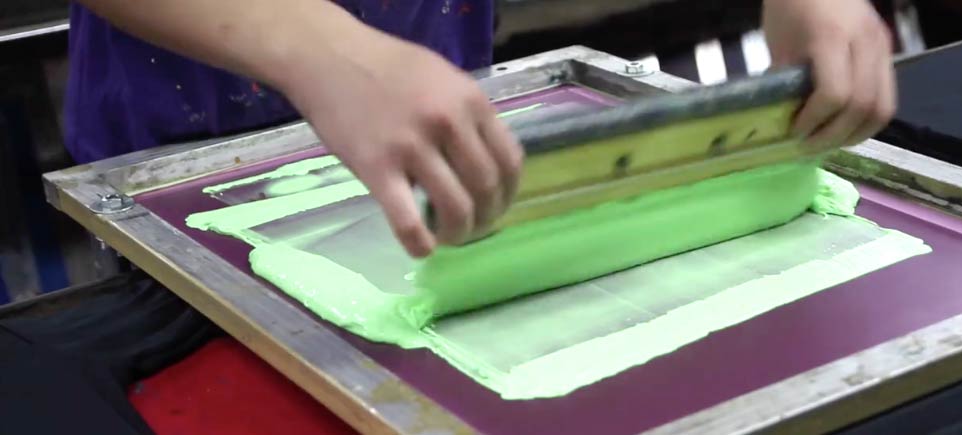
Applying the silkscreen printing ink
While the screen is dried, the ink can be mixed to match the Pantone colours required for the desired visual effect of the artwork. After the screen is dried, it can be placed on top of the apparel. The apparel must be placed on a flat, stable plane. Ink is poured onto the top of the screen and is flooded across the mesh to ensure that the ink fills the mesh entirely. Using a rubber blade or commonly known as squeegee, the ink is pushed down the screen with added pressure, at a 45 degree angle to press the ink unto the mesh. Doing this in firm, swift stroke is important to get a crisp image printed. Sometimes, a first layer of white ink needs to be printed first so that the colours printed subsequently will be more vibrant.
Some tips:
• Make sure to rinse the mesh well before switching to a different ink colour so that the inks do not mix.
• If the printing is done on a light coloured tee, the lightest colour should be printed first before the darker colours.
• Make sure to mix the plastisol ink well as it is thick and may be clumpy
• Use a denser mesh for artwork requiring several colours to be printed
Curing
The best, ideal curing method is using a textile tunnel dryer. Apparel such is t-shirts, is placed on the conveyor belt and exposed under the heating element of the textile dryer. Curing the print which dries the ink and bonds it to the fabric better. An alternative is using a heat press machine to cure the prints. However, the pressure does not need to be as high as a regular heat press printing process would need.
Advantages of Silkscreen Printing
• Cost effective for higher quantities (For lower quantities, consider the heat press printing method instead)
• Silkscreen prints are long lasting and durable
• Plastisol ink produces vibrant colours
• Silkscreen printing can be done on a wide range of surfaces and apparel types (eg. caps, tote bags, bottles)
Get your apparel silkscreen printed here at Ark Industries! Send us a message below for a quote!